Liz's UV Camera Quest in Animal Hospital — All 4 Photos & the Reward
Liz is the "new lore character" that Harlow's Favorite Update kept hidden behind a [REDACTED] tag until July 10, 2026. Here's everything the community has confirmed about her so far — and what's still being verified.
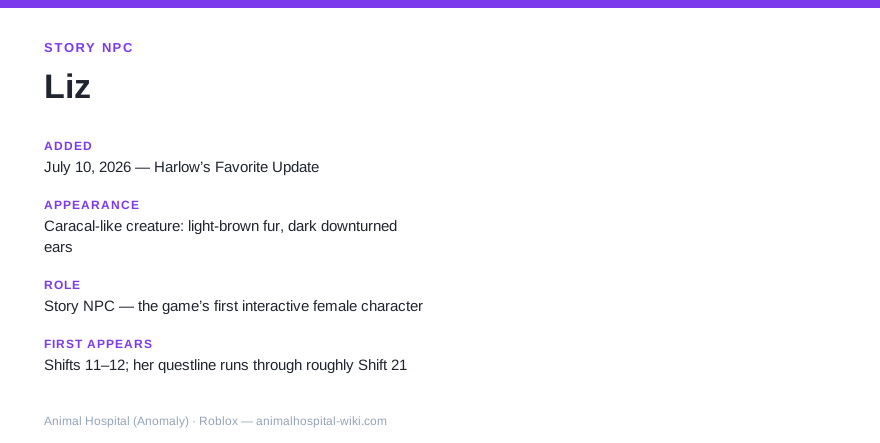
Caracal-like creature: light-brown fur, dark downturned ears
Role
Story NPC — the game's first interactive female character
First appears
Shifts 11–12; her questline runs through roughly Shift 21
🐈 Who is Liz?
Liz — full name Lizbeth — used to work for Animal Corp's news channel, and was fired for telling the truth about the anomaly infection. That makes her the second character with a direct Animal Corp connection: Ratthew's missing twin sister Rattina also worked for the Corporation before she disappeared.
A fired whistleblower journalist showing up at the one hospital where the infection is visible every night is unlikely to be a coincidence — the community reads her as the story finally moving from hints (Ron's briefcase, Ratthew's safe) toward someone actively collecting proof.
📸 The UV camera quest
When Liz appears, she hands you her UV camera and asks you to photograph a specific visitor for her. One warning is already well documented: if you waste the photo, Liz takes the camera backand tells you she can't trust you — so don't fire it off at random patients.
The full chain is now community-documented: 4 photos in total, each capturing a different stage of the anomaly infection. The first three prints read "the photo captured something strange..." — the fourth reads "the photo shows a horrifying creature...". After the 3rd photo she rewards you with a Chocolate Bar (+60 sanity over three bites, the best sanity item in the game).
The 4th photo is a trap in disguise: once you take it, the photographed patient turns into a Mimic and attacks anyone nearby. Reject, tase or shoot that patient before you inspect the picture.
The Liz UV camera quest, photo by photo
Photo 1— the print reads "the photo captured something strange...". Nothing else happens yet.
Photo 2 — same message, next stage of the anomaly infection.
Photo 3 — same message, and Liz rewards you with a Chocolate Bar (+60 sanity over three bites, the best sanity item in the game).
Photo 4— the print reads "the photo shows a horrifying creature..." and the patient turns into a Mimic. Deal with the patient before you inspect this one.
Be holding something before you take photo 4
The fourth shot is the only step in the Liz UV camera quest that can end a run. The patient you photograph turns into a Mimic and attacks — and by then you are deep enough into the run (her questline runs to roughly Shift 21) that losing it is expensive. What answers a Mimic is a single gun round or a taser, so the preparation is simply: have one of those on you before you press the shutter, not after.
Starts with a gun — 20 rounds at level 1, 30 at level 2. One of them is the whole cost of the fight.
Anything else
The front-desk taser is your fallback. A Mimic is slower than you are, so you can outrun it to the desk — but that is a plan, not an accident, and it is worth deciding before the shot rather than during it.
What the Chocolate Bar is actually worth
The photo-3 reward reads like a small thank-you and is anything but. With no class bought you start a shift on 61 sanity, and the Chocolate Bar restores +60 across three bites — close to a second full bar, handed to you in the back half of a run where the threats are stacked and nothing else refills you that fast. Bank it. The temptation is to eat it the moment a Stalker costs you 10, but a −20 jumpscare or a Mimic that reaches you is where that 60 actually earns its place.
👁️ Liz and the new Stalker interaction
The same update shipped a hidden "[REDACTED] interaction", which community reports identify as a new Stalkerbehavior: it now has a small chance to check in disguised as a patient, and photographing it makes it leave. Whether that photo is meant to be taken with Liz's UV camera — and whether that's the target of her request — is the leading theory, but it is not yet confirmed. Treat it as a theory, not a mechanic.
⏳ Still being verified
Now documented since launch week: her appearance window (Shifts 11–21), the 4-photo quest chain, and the Chocolate Bar reward. Still being mapped: her full dialogue tree and how the camera's target patient is chosen each time. We only publish what we can verify — this page is re-checked while the update is fresh.
Liz's full lore profile
Everything below is the character record: appearance, story role, what he or she knows, and where the open questions still sit — kept separate from the walkthrough above.
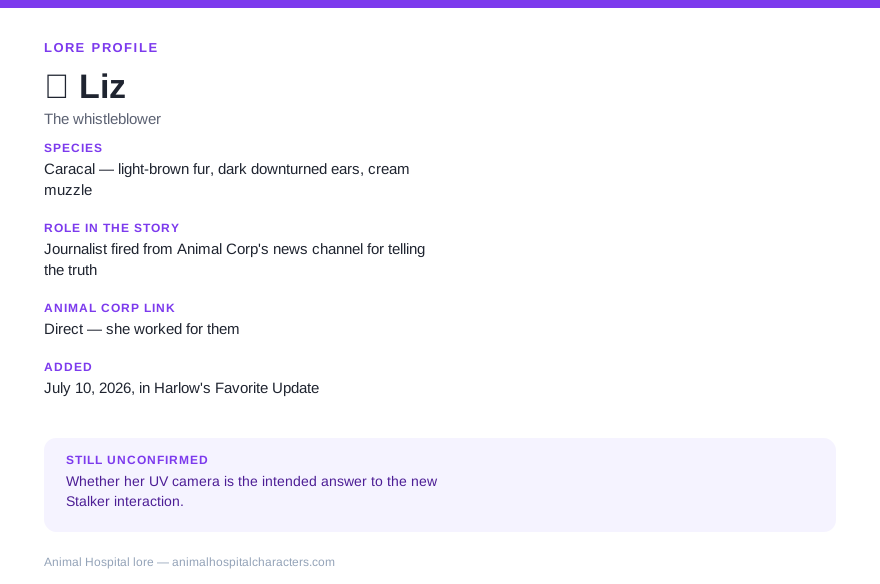
Liz — lore quick facts
Species
Caracal — light-brown fur, dark downturned ears, cream muzzle
Role in the story
Journalist fired from Animal Corp's news channel for telling the truth
Animal Corp link
Direct — she worked for them
Added
July 10, 2026, in Harlow's Favorite Update
What animal is Liz?
Liz is a caracal-like creature — light-brown fur, dark downturned ears with a gradient, a white ring around her eyes, and a cream muzzle. She wears a light blue cap, black shirt, navy jacket, and carries a white camera everywhere she goes.
Community descriptions consistently note she's "always exaggerative and energetic" — she lengthens words for emphasis ("Huuuuge") and talks in a register closer to a hyped-up streamer than a hospital patient. That energy is a deliberate contrast to what she's actually here to do.
The Animal Corp connection
Liz used to work for Animal Corp's own news channel — and was fired for reporting the truth about the anomaly infection. That makes her the second character in the story with a confirmed employment history at the company, after Rattina, who vanished after working there.
The parallel is hard to miss: one Animal Corp insider disappeared trying to expose something, and now the company's fired reporter has planted herself in the building where that same something keeps breaking through. Whether Liz is hunting for Rattina specifically, or just chasing the same story from a different angle, hasn't been confirmed — but it's the leading theory in the community.
The UV camera
Liz first appears around Shifts 11–12, and she arrives with a job for you: her UV camera and a four-photo assignment, each shot capturing a different stage of the anomaly infection. Point it at the wrong patient and the deal is off — she reclaims the camera with a flat "I can't trust you."
A camera lent by a journalist, used to document something the hospital would rather stay hidden — it's the most direct piece of "gathering evidence" gameplay in the story so far, mirroring what got her fired in the first place.
Where Liz sits in the Animal Corp web
Liz is one of the 2 characters the game says actually worked for the Corporation. That is the strongest link anyone in this cast has — everyone else is connected through a person, an object, or not at all.
Character
Link
What the game actually shows
🐈 Liz ← this page
Worked for the Corporation
Worked for Animal Corp's news channel and was fired for telling the truth about the infection.
The only character doing ordinary work for an ordinary reason. He is not investigating the Corporation — he is looking for one specific criminal.
The briefcase nobody opens
One object shows up three separate times, and it is the same object each time: a black suitcase stamped TOP SECRET in red. It is never opened on screen.
Ron from Accounting carries one — Same black case, same red stamp — on a character whose job has nothing to do with medicine.
Three carriers, no contents. Treat any account of what is inside as invention — the game has not shown it, and neither have we.
What Liz knows, and what they do with it
Sorted by what each of them does with what they have, the cast falls into four positions — and Liz is in the one labelled knows and tells you. Only Ratthew does the same. Both of the characters who tell you things are outsiders to the hospital itself — nobody on staff volunteers anything.
Character
What they know
What they do with it
🐈 Liz
Knows and tells you
That the infection is real, and that Animal Corp buried the story.
Tells you, and hands you a camera so you can gather the proof she was fired for trying to publish.
Less than you do, by the time he arrives. He has a photograph and a name.
Asks his questions and acts on your answer — which is why the choice lands on you rather than him.
⏳ Still unconfirmed
What Liz ultimately does with the four infection-stage photos once her assignment is complete (the mechanics — a Chocolate Bar after the 3rd photo — are documented; the story payoff isn't)
Whether she's specifically searching for Rattina, or investigating something broader
Any direct interaction between Liz and the other Animal Corp-linked evidence (Ron's and Harlow's briefcases, the Room 5 safe)
See where she fits in the bigger picture
The full Animal Corp conspiracy, chronologically — Liz's arrival is the most recent entry.
How does Liz's UV camera quest work in Animal Hospital?
Liz hands you a UV camera and asks you to photograph specific visitors — four photos in all, each catching a later stage of the anomaly infection. Photo 3 pays out a Chocolate Bar (+60 sanity over three bites). Photo 4 turns the photographed patient into a Mimic that attacks, so have a taser or gun in hand before you take it.
What happens if you waste a photo on Liz's UV camera?
She takes the camera back and tells you she cannot trust you, which ends the quest. Do not fire it at random patients — every shot in Liz's UV camera quest is meant for the visitor she names.
Who is Liz in Animal Hospital?
Liz (Lizbeth) is a caracal-like NPC added in the July 10, 2026 update. She used to work for Animal Corp's news channel and was fired for telling the truth about the anomaly infection. She is the game's first interactive female character.
When does Liz appear in Animal Hospital?
She debuts around Shifts 11–12 and stays part of your run through roughly Shift 21 — you hold her UV camera for the next 8–10 shifts after she first shows up.
What reward does Liz give you?
After the 3rd photo she rewards you with a Chocolate Bar (+60 sanity over three bites). Watch out after the 4th: the photographed patient turns into a Mimic and attacks — reject, tase or shoot it before inspecting the picture.
Why was Liz fired from Animal Corp?
For telling the truth about the anomaly infection on Animal Corp's own news channel. She's the second character (after Rattina) confirmed to have worked directly for the company.
What does Liz look like?
A caracal-like creature with light-brown fur, dark brown downturned ears with a gradient, a white ring around her eyes and eyelashes, and a cream-colored muzzle. She wears a light blue cap, black shirt, navy jacket, gray pants, and carries a white camera.